DIY bobber build using salvaged components


Creating a custom bobber can be an incredibly rewarding experience, especially when you embrace the art of salvage to fuel your DIY adventure. By utilizing reclaimed materials, you not only save money but also contribute to environmental sustainability, giving new life to items that might otherwise end up in a landfill. This approach allows you to craft a unique bobber that reflects your personality and style.
In this guide, we will walk you through the process of building your own bobber from salvaged components, emphasizing the creativity and resourcefulness inherent in DIY projects. From sourcing materials to assembling the final piece, we will explore the various aspects that make constructing a bobber an engaging and fulfilling task. Prepare to unleash your inner craftsman as you transform everyday items into a stunning embodiment of your skills and vision.
Whether you’re an experienced builder or a newcomer to the world of DIY, this project is suitable for everyone. By the end of this journey, you will not only have a remarkable bobber but also the satisfaction of knowing that it was constructed with care and creativity from materials that have a story to tell. Let’s dive into the exciting world of salvage and start crafting your own unique bobber today!
Finding and Selecting Reclaimed Parts for Your Bobber
Building a bobber from reclaimed materials not only adds a unique character to your motorcycle but also promotes sustainability. To begin this process, the first step is to identify potential sources for salvaged parts. Local salvage yards, motorcycle shops, and online marketplaces are excellent places to start your search.
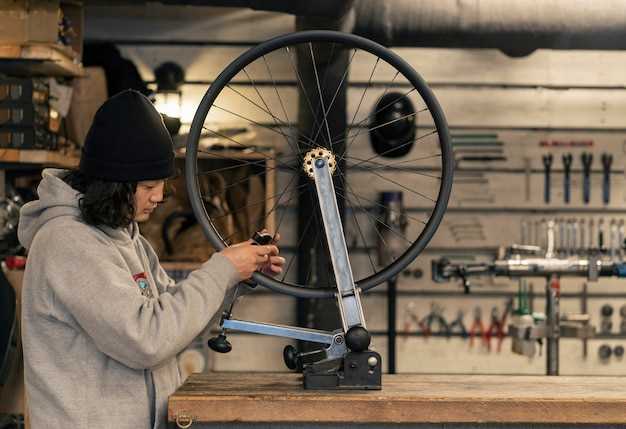
When selecting parts, pay attention to the condition and compatibility of each item with your bobber project. Look for pieces that exhibit minimal corrosion and structural integrity. A visually appealing part may be tempting, but ensure it is durable enough for practical use. This is particularly important for components like the frame, wheels, and suspension.
Another factor to consider is the style of the parts. Reclaimed items should complement each other, contributing to an overall aesthetic that defines your bobber. Mixing different eras or styles can create a unique build, but cohesion is key for a polished look.
Additionally, consider the functionality of each salvaged component. Parts should not only fit well but also serve their intended purpose effectively. For instance, if you are looking at a reclaimed seat, assess its comfort and mounting options to ensure it will work well on your bike.
Don’t hesitate to negotiate prices while purchasing reclaimed parts. Many sellers are willing to lower prices, especially for bulk purchases. Building relationships with local salvage yard owners can also lead to exclusive deals or early access to new arrivals. Finally, explore community forums or social media groups focused on bobbers and custom builds; other enthusiasts can provide valuable information on where to find quality reclaimed parts.
Step-by-Step Guide to Assembling Your DIY Bobber
Assembling your own bobber from reclaimed materials can be a rewarding project that not only saves you money but also allows for a unique creation. Below is a detailed guide to help you through the process.
Step 1: Gather Reclaimed Parts
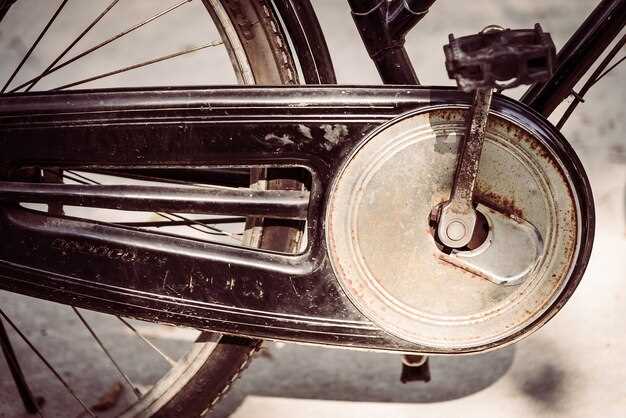
Start by salvaging materials from old motorcycles, bicycles, or even furniture. Look for steel or aluminum frames, wheels, handlebars, and any other components that can be repurposed. Ensure the parts are in good condition, free from rust, and still functional.
Step 2: Design Your Bobber
Sketch a design for your bobber. Consider the arrangement of the parts you salvaged, focusing on the aesthetic and functionality. Decide on the frame shape, seat placement, and where to mount the engine and other essentials.
Step 3: Prepare the Frame
Using a workbench or secure area, begin to assemble the frame of your bobber. If you’re using a salvaged frame, ensure that it’s stripped of any unnecessary parts. If you need to cut or weld pieces together, take safety precautions and use appropriate tools.
Step 4: Attach Major Components
Once the frame is ready, begin attaching major components like the engine, wheels, and handlebars. Use bolts and screws where necessary for secure mounting. Make sure that everything fits well and that there is adequate clearance for moving parts.
Step 5: Install Electrical Systems
Integrate the electrical system of your bobber. If you salvaged components like lights or a battery, connect them according to standard practices. Ensure that the wiring is secure and insulated to prevent any short circuits.
Step 6: Customize Finishing Touches
Now that the main parts are assembled, focus on customization. Paint your bobber using a rust-resistant finish, adding personal touches like decals or unique details. Consider the seat material and style for added flair.
Step 7: Conduct Final Checks
Before taking your bobber out for a ride, perform a thorough check of all parts and systems. Ensure that the brakes work, lights are functional, and all fastenings are tight. Prioritize safety to guarantee a smooth ride.
Step 8: Take Your Bobber for a Spin
Once you’re satisfied with your assembly and checks, it’s time to take your DIY bobber for its maiden voyage. If everything runs well, enjoy your unique creation, knowing you’ve built it from reclaimed materials.
Customizing and Finishing Touches for a Unique Bobber Style
Customizing your bobber is essential to make it stand out and reflect your personal style. Utilizing reclaimed materials allows for a unique approach to customization by salvaging parts that tell a story. Begin with the frame: reshape or repaint it to emphasize its character. Consider using old bicycle parts or other metal scraps to create distinctive elements for the bike.
The fenders are another area where creativity can shine. Salvaged metal or wooden components can be crafted into custom fenders, offering a rustic charm that mass-produced options lack. Experiment with textures and finishes, whether you opt for a raw, industrial look or a polished vintage style.
For the seating, think outside the box. Reclaimed leather from old jackets or furniture can make for a comfortable and stylish bobber seat. Be sure to enhance this piece with unique stitching patterns or contrasting colors, turning it into a focal point of the bike.
Your choice of handlebars can drastically affect the overall aesthetic. Salvaging parts from various sources can lead to the perfect combination of style and ergonomics. Whether they are wide, narrow, high, or low, handlebars set the tone for the bike’s character.
Lastly, finishing touches like custom paint jobs or decals can add personality to your bobber. Consider using eco-friendly paint products to maintain an environmentally conscious ethos. Old automotive finishes can also be repurposed to create an eye-catching design that encapsulates your vision.
By thoughtfully customizing each aspect of your bobber using salvaged parts, you can achieve a uniquely styled motorcycle that stands out while respecting the past.