Steps to rebuild a salvaged motorcycle engine


Rebuilding a motorcycle engine can seem like a daunting task, especially if you’re working with a salvaged bike. However, with the right approach and understanding of the process, it can be an incredibly rewarding experience. This guide will walk you through the essential steps to successfully rebuild your motorcycle engine, ensuring it runs smoothly and efficiently once more.
First and foremost, it’s vital to have a clear plan. Assessing the condition of the salvaged engine will give you insight into what components need replacement or repair. Identifying any potential issues early on can save you time and resources further down the line. Key parts to focus on include the cylinders, pistons, and crankshaft, all of which play a significant role in the overall performance of the engine.
As you embark on this journey, gather all the necessary tools and resources. Proper tools will streamline the rebuilding process, allowing you to work more efficiently. Additionally, having access to a reliable service manual for your specific bike model will provide invaluable guidance and technical specifications, ensuring you adhere to the manufacturer’s standards.
Finally, take your time and document each step of the rebuild. This not only helps maintain organization but also allows you to revisit any stages if issues arise in the future. With patience and careful attention to detail, you’ll turn that salvaged motorcycle engine into a powerful, reliable bike once again.
Assessing Damage and Preparing for the Rebuild
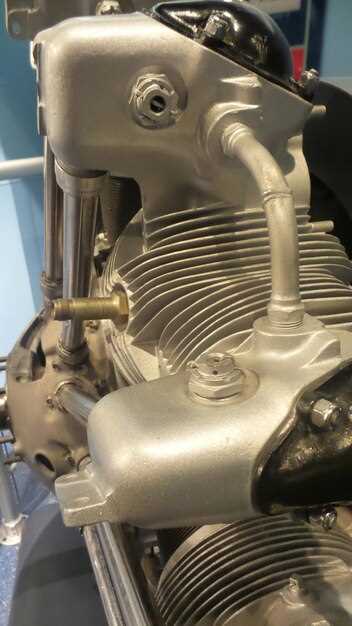
Before diving into the rebuild of a salvaged bike engine, it is crucial to conduct a thorough assessment of the damage. Start by inspecting the engine exterior for any obvious signs of impact, such as cracks, dents, or other deformities that may indicate structural issues. Look closely at areas like the engine block, casing, and mounting points, as these are vital for maintaining engine integrity.
Next, evaluate the internal components. Remove the engine covers to access the crankcase and inspect for signs of oil leaks or contamination. Pay special attention to the condition of the pistons, cylinders, and crankshaft. Any scoring or pitting on these components can significantly affect performance and longevity. Use a bore scope if necessary to get a clear view of the cylinder walls.
Additionally, check the timing mechanism and valve train. Ensure that the timing chain or belt is intact and free from wear. Examine the valves for signs of bending or improper seating, which can lead to loss of compression and engine failure. Don’t forget to test the electrical components, including the starter and ignition system, to ensure they are in working order.
Once the damage assessment is complete, create a detailed list of parts that will need replacement or repair. This inventory will guide you during the rebuilding process and help in sourcing the necessary parts effectively. Proper preparation is essential to ensure that the rebuild is successful and the engine functions optimally once reassembled. Having the right tools and parts ready will streamline the entire rebuild process and minimize downtime.
Disassembling the Engine and Cleaning Components
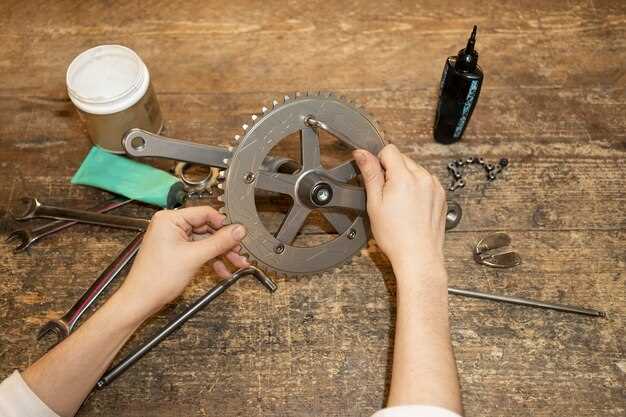
The first step in rebuilding a salvaged motorcycle engine is to carefully disassemble the engine components. Start by removing the engine from the bike frame, ensuring that all attached cables and hoses are disconnected. Use a clean workspace to lay out the parts as you remove them, which will help in organizing the components for reassembly.
Begin disassembly with the external parts, such as the exhaust system and the intake manifold. Pay close attention to the order of removal, and take notes or photographs to assist in the rebuild process later. After these parts are off, proceed to remove the cylinder head, followed by the cylinders themselves. Make sure to keep track of all fasteners and gaskets, as they may need replacement during the rebuild.
Next, attention turns to the internal parts of the engine. Carefully extract the pistons and connecting rods while checking for any wear or damage. This allows for the assessment of which components need to be salvaged or replaced. It’s crucial to handle each part with care to avoid causing further damage.
Once disassembled, the real task begins: cleaning the components. Start by using a degreaser to remove grime, oil, and carbon deposits from each piece. A parts washer can be extremely effective for this step, ensuring that all debris is eliminated. For stubborn deposits, a wire brush or abrasive pad may be necessary. Pay particular attention to areas where oil tends to accumulate, as these can affect performance if not cleaned properly.
After degreasing, rinse the parts with water and dry them thoroughly to prevent rust. Inspect each component for cracks or significant wear that could affect the engine’s functionality. Any part that shows signs of major damage should be replaced to ensure a successful rebuild.
Finally, prepare the cleaned parts for reassembly by applying a light coat of oil to surfaces that require lubrication. This helps in protecting the components before they are reinstalled in the engine. With all pieces cleaned and organized, you are now ready to move forward with the rebuilding process, ensuring that the salvaged engine is restored to its former glory.
Reassembling the Engine with New Parts and Testing
Reassembling a salvaged motorcycle engine is a crucial step in the rebuild process. This stage not only requires precision but also a clear understanding of each component and its function. Below is a step-by-step guide to reassemble your engine with new parts and conduct necessary tests.
- Gather Necessary Tools and Parts
- New gaskets
- Seals and O-rings
- Replacement bolts and fasteners
- Torque wrench
- Engine assembly lubricant
- Other specific parts as needed
- Clean All Components
Before reassembly, ensure that all engine parts are thoroughly cleaned. Remove any old oil, dirt, or debris to prevent contamination.
- Assemble the Engine Block
Start with the engine block. Apply gasket maker to the mating surfaces and install the new gasket. Carefully position and tighten the engine cover to the specified torque using your torque wrench.
- Install the Crankshaft and Pistons
Place the crankshaft into the engine block, ensuring it is seated correctly. Next, connect the pistons to the connecting rods, using new bolts, and insert them into the cylinders.
- Attach the Cylinder Head
Install the cylinder head over the pistons, using new head gaskets to ensure a tight seal. Tighten the head bolts in a crisscross pattern to avoid warping.
- Install Valves and Timing Components
Install new valves and adjust their clearances as per the manufacturer’s specifications. Set up the timing chain or belt according to the marking on the sprockets.
- Reconnect All Accessories
Reconnect components such as the carburetor, ignition system, and exhaust headers. Ensure all wiring is properly secured and connections are tight.
- Fill with Fluids
Once the engine is reassembled, fill it with the appropriate engine oil and coolant as recommended for your bike model.
- Conduct Initial Tests
Before starting the engine, perform the following checks:
- Inspect for any leaks around gaskets and seals.
- Ensure that all electrical connections are secure.
- Check oil levels and coolant levels.
- Start the Engine
Start your bike and let it idle for a few minutes. Listen for any irregular sounds and check the temperature gauge. Pay attention to engine performance and ensure that everything is functioning smoothly.
- Conduct a Road Test
After you are satisfied with the initial testing, take your bike for a short ride. Monitor engine response and performance. Make sure to check for any leaks or issues after the ride.
Rebuilding and reassembling an engine can be a complex but rewarding task. By following these steps, you can breathe new life into your salvaged motorcycle.