How to turn salvaged motorcycles into electric projects


In an era where sustainability is more crucial than ever, the idea of building electric motorcycles from salvaged parts has gained significant traction. Enthusiasts and hobbyists alike are discovering the thrill of converting old, damaged machines into cutting-edge electric vehicles. Not only does this approach breathe new life into neglected motorcycles, but it also aligns with the principles of environmental conservation and innovation.
The process of transforming a salvage motorcycle into an electric project offers a unique blend of creativity and technical skill. Riders can salvage usable components from derelict bikes, while simultaneously learning about electric propulsion systems, battery management, and energy efficiency. This hands-on experience not only enhances mechanical knowledge but also fosters a deeper appreciation for motorcycle engineering.
Moreover, this conversion journey paves the way for custom designs that cater to individual preferences and needs. The combination of retro aesthetics and modern electric technology can lead to truly unique creations that stand out on the roads. As you delve into the step-by-step of building your electric motorcycle, you’ll uncover a rewarding hobby that promotes resourcefulness and ingenuity.
Assessing Salvaged Motorcycles for Electric Conversion Potential

When considering the transformation of salvaged motorcycles into electric projects, the first step is to evaluate the condition and compatibility of the motorcycle frame and components. Inspect the frame for structural integrity and signs of significant rust or damage that may affect the build process. A solid and intact frame serves as the foundation for any successful electric conversion.
Next, assess the state of the original engine and transmission. These components are typically heavy and bulky, making them less suitable for an electric build. A salvaged motorcycle with a seized or damaged engine can be beneficial since removing these parts will reduce the overall weight, allowing for a more efficient setup. Also, look for motorcycles that use lightweight materials in their construction, as they can enhance the performance of your electric project.
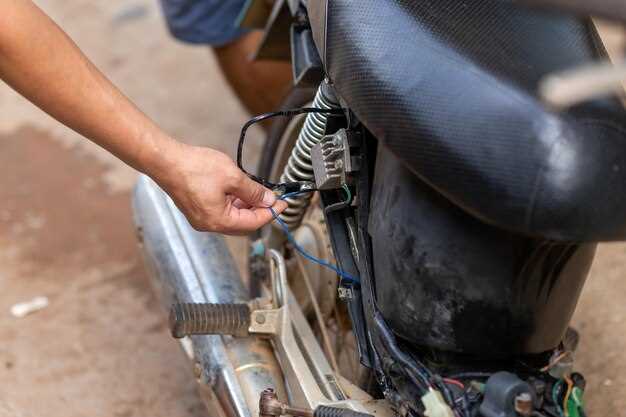
The next critical factor to consider is the electrical system of the salvaged motorcycle. Investigate the wiring harness and any existing electronic components. An intact and functional electrical system can minimize initial setup challenges and facilitate the integration of electric components, such as the battery and motor. Conversely, extensive electrical damage may complicate the conversion process and require significant troubleshooting or rewiring.
Moreover, the motorcycle’s existing suspension and braking systems must be evaluated. Electric conversions often alter the weight distribution due to the batteries and motor placement. Therefore, proper suspension setup is necessary to ensure optimal handling and safety. Upgrading the brakes might be necessary to accommodate for the increased torque and weight of the electric build.
Lastly, consider the motorcycle’s intended usage. Assessing the type of riding–whether it be for commuting, recreational use, or off-road adventures–can influence the choice of components used in your electric conversion. A clear understanding of your project’s goals will help in selecting the right salvaged motorcycle that aligns with your vision for the electric transformation.
Essential Components and Tools for Electric Motorcycle Builds
When embarking on an electric motorcycle build, understanding the essential components is crucial for creating a successful project. The primary elements include the electric motor, battery pack, controller, and drivetrain components.
The electric motor serves as the core of the motorcycle, converting electrical energy into mechanical power. Choosing a high-quality motor with the appropriate output for your desired performance is vital. Brushless DC motors are popular for their efficiency and longevity.
The battery pack is another critical component, providing the necessary energy for your motorcycle. Lithium-ion batteries are commonly used due to their lightweight and high energy density. It is important to calculate the required capacity based on your range and performance expectations to ensure optimal functionality.
The controller manages the flow of electricity between the battery and the motor, allowing for smooth acceleration and deceleration. Selecting a controller that is compatible with your motor and battery specifications is essential for seamless operation.
The drivetrain connects the motor to the wheels and influences the overall performance of the build. This may include components like chain or belt drive systems, gears, and axles, which should be chosen based on durability and efficiency.
In addition to these components, several tools are indispensable for any electric motorcycle build. A good set of wrenches, screwdrivers, and pliers will facilitate assembly. A multimeter is essential for electrical testing and troubleshooting, while a soldering iron is necessary for making secure electrical connections. A quality wire cutter and stripper will also streamline the installation of wiring for the battery and motor connections.
Proper workspace setup is important, as it allows for organized assembly and safe handling of components. A motorcycle stand can provide stability during the build process, making it easier to work on various parts of the motorcycle.
Understanding and sourcing these essential components and tools will ensure that your electric motorcycle build not only meets your expectations but also delivers an enjoyable riding experience.
Step-by-Step Guide to Installing Electric Drivetrains in Salvaged Bikes

Transforming salvaged motorcycles into electric projects can be a rewarding endeavor. By following these steps, you can successfully install an electric drivetrain in your salvaged bike, effectively converting it into an eco-friendly mode of transportation.
Step 1: Gather Required Tools and Materials
Before starting, collect all necessary tools, including wrenches, screwdrivers, and an electric drill. You’ll also need components such as an electric motor, battery pack, controller, wiring harness, and mounting brackets. Opt for parts that are compatible with your specific motorcycle model.
Step 2: Prepare the Motorcycle Frame
Examine the salvaged motorcycle for structural integrity. Remove the gas tank, exhaust system, and other non-essential components to create space for the electric parts. Clean any rust or debris from the frame, ensuring a solid foundation for your build.
Step 3: Install the Electric Motor
Choose a suitable location on the motorcycle frame to mount the electric motor. Most builders prefer the area where the original internal combustion engine was located. Secure the motor using mounting brackets, making sure it is aligned with the rear wheel for optimal power transfer.
Step 4: Set Up the Battery Pack
Select a battery pack that meets the power requirements of your chosen motor. Position the battery securely within the frame, ideally low to maintain the center of gravity. Use a battery enclosure for safety, ensuring terminals are protected and accessible for maintenance.
Step 5: Connect the Controller
The controller regulates the power from the battery to the motor. Connect the controller to the battery first, followed by the motor. Follow the manufacturer’s wiring diagram carefully, making sure all connections are tight and insulated to prevent shorts.
Step 6: Install Throttle and Braking Systems
Integrate an electric throttle control, which can either be a twist-grip or thumb-operated. Ensure it’s conveniently placed for easy access while riding. If necessary, adapt the braking system to accommodate the performance of your new electric drivetrain, ensuring reliable stopping power.
Step 7: Test the System
Before taking the bike on the road, conduct thorough testing. Power on the system and check for any wiring issues or abnormalities. Perform a controlled test ride in a safe environment, monitoring the performance of the electric drivetrain and braking system.
Step 8: Final Adjustments and Safety Checks
After initial testing, make any required adjustments to the motor positioning or wiring. Inspect all components thoroughly to ensure they are secure. Confirm that the brakes and throttle work efficiently, as safety is paramount for your electric motorcycle conversion.
Following these steps, you can successfully build a functional electric drivetrain into your salvaged motorcycle, creating a unique and sustainable ride.