How to repaint a rebuilt motorcycle for a fresh look


Rebuilding a motorcycle is a labor of love that not only enhances its performance but also revives its aesthetic appeal. One of the most impactful aspects of this process is the finish of the motorcycle, which can dramatically transform its overall look. The choice of paint plays a crucial role in defining the character and personality of your rebuilt ride.
When it comes to repainting a motorcycle, selecting the right type of paint and finish is essential. A high-quality finish not only improves appearance but also protects the underlying materials from wear and tear, weather, and other environmental factors. Different paint types, such as matte, gloss, or metallic, offer distinct looks and can help reflect the owner’s individual style.
Moreover, the repainting process is an opportunity to express creativity. Whether you decide to stick with classic color schemes or opt for bold, custom designs, the paint will serve as the motorcycle’s visual signature. A well-executed paint job can make your motorcycle stand out while emphasizing the hard work and dedication you’ve put into the rebuild.
Choosing the Right Paint Type for Rebuilt Motorcycles
When it comes to repainting a rebuilt motorcycle, selecting the appropriate type of paint is crucial for achieving a durable and attractive finish. Different paint types offer varying levels of performance, appearance, and longevity. Below are the primary categories to consider:
- Acrylic Enamel:
Acrylic enamel is a popular choice among motorcycle enthusiasts due to its glossy finish and ease of application. It dries quickly and is relatively resistant to UV rays, making it ideal for outdoor use. However, it may require a clear coat for additional protection.
- Polyurethane Paint:
This type of paint provides a hard and durable finish, making it suitable for high-traffic areas on the motorcycle. Polyurethane paints can withstand scratches and chemicals, ensuring a long-lasting appearance.
- Base Coat/Clear Coat Systems:
A base coat/clear coat system allows for intricate designs and a deep, glossy finish. The base coat provides color and the clear coat adds protection. This method is often favored for custom builds where aesthetics are paramount.
- Epoxy Paint:
Epoxy paints offer exceptional adhesion and durability. They are ideal for motorcycle frames and parts exposed to harsh conditions. Though they may have a lower aesthetic appeal on the surface, their protective qualities are unparalleled.
When choosing the right paint, consider the following factors:
- Intended Use:
Determine whether the motorcycle will be used primarily for daily commuting or long-distance touring. The paint type should align with the level of wear and tear it will experience.
- Environmental Factors:
Evaluate the climate in which the motorcycle will be primarily used. Exposure to sunlight, rain, or extreme temperatures will influence the longevity of the finish.
- Color Preferences:
Choose colors that resonate with your personal style while considering visibility and safety on the road. Some paints offer custom color mixing, providing endless possibilities.
- Budget:
Quality paint can be an investment. Assess how much you are willing to spend, as higher-end paints often deliver better results and enhanced durability.
In summary, choosing the right paint type for your rebuilt motorcycle involves balancing aesthetics with functionality. Assess your specific needs and preferences to ensure a stunning and resilient finish that complements your motorcycle’s rebuilt nature.
Steps to Prepare Your Motorcycle for a New Paint Job
Preparing your motorcycle for a new paint job involves several important steps to ensure a flawless finish. Start by thoroughly cleaning the motorcycle to remove dirt, grease, and grime. Use a degreaser for stubborn areas and wash the entire surface with soap and water. Rinse well and dry completely, as any moisture can hinder paint adhesion.
Next, inspect the motorcycle for any damages, such as dents or rust spots. Address these issues before proceeding with the paint job. Sand down any rough areas using sandpaper or a grinder to create a smooth surface. For rust spots, treat them with a rust converter and sand down to bare metal if necessary.
Once the surface is prepped, it is crucial to tape off any parts of the motorcycle that should not be painted, such as the chrome accents, windshield, and parts of the engine. Use painter’s tape and cover sections with plastic or newspaper to protect them from overspray.
After masking, consider applying a primer coat. This step enhances paint adhesion and provides a uniform base for your new color. Allow the primer to dry completely before proceeding with the topcoat.
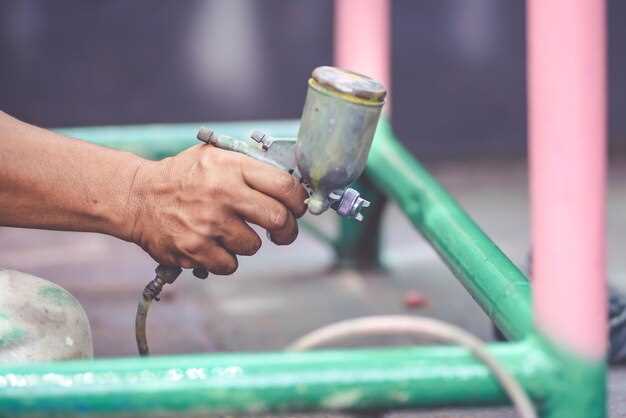
Finally, choose high-quality motorcycle paint for the best results. In a well-ventilated area, apply the new paint using even strokes, allowing each coat to dry according to the manufacturer’s instructions. Multiple thin layers will give a smoother appearance compared to one thick application.
Techniques for Achieving a Professional-Looking Finish
To achieve a stunning, professional-looking finish when repainting a rebuilt motorcycle, careful attention to detail is essential. One of the first steps is surface preparation. Ensure that the motorcycle’s surface is clean, dry, and free from rust. Sanding the existing paint or primer with fine-grit sandpaper creates a smooth base that enhances paint adhesion.
Selecting the right type of paint is crucial. Automotive-grade paints often provide superior durability and a better finish compared to standard spray paint. A two-component urethane paint system is highly recommended for its resilience and gloss retention. Proper mixing of the paint according to the manufacturer’s instructions is essential for optimal results.
When applying paint, use a high-quality spray gun for an even and controlled spray pattern. Hold the gun at the correct distance from the surface–typically around 6 to 10 inches–to avoid drips and ensure an even coat. Multiple light coats are preferred over a single heavy application, allowing for adequate drying time between coats to prevent runs and imperfections.
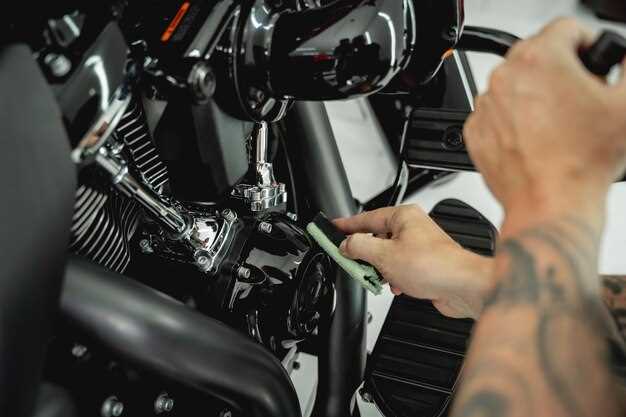
After painting, the finish can be further enhanced through polishing. Once the paint has cured completely, utilize a buffing wheel with fine polishing compound to achieve a glossy, mirror-like effect. This step not only improves aesthetics but also protects the paint from environmental elements.
Finally, always finish with a high-quality clear coat. This provides extra protection and enhances the depth of the color, ensuring that the motorcycle maintains its freshly painted look for years. Following these techniques will dramatically increase the quality of the paint finish on your motorcycle, making it look professional and polished.