How to safely remove parts from a salvage bike


When it comes to working with salvage bikes, ensuring safety should be your top priority. Removing parts from these bikes can be a rewarding process, allowing you to salvage valuable components for repairs or upgrades. However, it is essential to approach this task with caution and the right techniques to avoid injury and damage.
In this article, we will explore effective tips that will help you safely remove various parts from salvage bikes. Whether you are dealing with rusted bolts, delicate wiring, or heavy frames, knowing the best practices will not only streamline your efforts but also protect you and your workspace. From selecting the right tools to understanding the intricacies of bike assembly, these insights will empower you to take on your salvage bike project with confidence.
By adhering to these safe techniques, you can maximize the potential of salvage bikes while minimizing risks. Let’s dive into the essential strategies that will guide you through the part removal process effectively and safely.
Preparing Your Workspace for Safe Part Removal
Before starting the removal of parts from salvage bikes, it is essential to create a well-organized and safe workspace. A tidy environment minimizes the risk of accidents and ensures efficient workflow. Begin by selecting an appropriate area with ample lighting and ventilation. A clean, flat surface, such as a workbench, will keep tools organized and parts easily accessible.
Next, gather all necessary tools and materials required for the part removal process. This may include wrenches, screwdrivers, pliers, and safety gear like gloves and goggles. Having everything at hand will reduce the chances of distraction or mishandling tools while working.
Safety is a paramount concern, so ensure your workspace is free from clutter. Remove any unnecessary items that could pose a tripping hazard or obstruct movement. Additionally, clear away any potential hazards, such as oil spills or debris, to maintain a safe environment.
Consider establishing designated zones for different tasks. For instance, create a specific area for tool storage and another for removed parts. This organization aids in tracking parts and prevents confusion during reassembly. Furthermore, label containers for small components to avoid loss and ensure easy access when needed later.
Another critical aspect of safety is ensuring your workspace has adequate emergency measures in place. Keep a fire extinguisher nearby and ensure first-aid supplies are readily available. Familiarize yourself with emergency procedures to respond quickly in case of an accident.
Utilizing a proper lifting technique is also important. If parts are heavy or unwieldy, seek assistance or use equipment like a motorcycle lift. This approach reduces strain and potential injuries while enhancing safety during the removal process.
By taking the time to prepare your workspace with these considerations, you will create an environment that promotes safety and efficiency during part removal from salvage bikes.
Essential Tools and Equipment for Safe Disassembly
When removing parts from salvage bikes, having the right tools and equipment is crucial for both efficiency and safety. Each tool plays a specific role in ensuring that the removal process is executed safely, minimizing the risk of injury and damage to components.
1. Socket Set: A comprehensive socket set is essential for loosening and removing bolts and nuts. Ensure that the set includes a range of sizes to accommodate various parts. Using the correct socket size prevents slippage and potential injury during the removal process.
2. Wrenches: Adjustable wrenches and torque wrenches are vital for precise removal of components. Torque wrenches help avoid overtightening, which can lead to damage or accidents. Always utilize them according to manufacturer specifications for safety.
3. Screwdrivers: A set of both flathead and Phillips screwdrivers is necessary for securing and removing different types of screws. Use screwdrivers that fit snugly to prevent stripping the screw head, which can complicate removal and pose safety risks.
4. Pliers: Various types of pliers, including needle-nose and locking pliers, assist in gripping and turning components during disassembly. They are especially useful when dealing with tight spaces or stubborn parts.
5. Wire Cutters: Wire cutters are handy for removing any electrical components or cables. Always ensure power is disconnected before attempting to remove electrical parts, enhancing safety during disassembly.
6. Safety Gear: Personal protective equipment (PPE) such as gloves, goggles, and steel-toed boots are essential. Gloves protect your hands from sharp edges, while goggles shield your eyes from debris. Proper footwear helps prevent foot injuries in case of falling parts.
7. Workbench or Sturdy Surface: A solid workbench provides a stable area for disassembling bikes. Ensure it is clear of clutter to prevent accidents and allows for safe handling of heavy parts during removal.
8. Magnetic Tray: Using a magnetic tray keeps small parts like screws and bolts organized and prevents them from getting lost. This not only streamlines the reassembly process but also enhances safety by reducing the chances of tripping over misplaced items.
Appropriate tools and equipment are vital in ensuring safe and effective disassembly of salvage bikes. By prioritizing safety through the use of the right tools, you can effectively manage the removal process and enjoy a successful salvage operation.
Step-by-Step Guide to Safely Detach Bike Components
Removing parts from salvage bikes can be a rewarding task if approached correctly. Follow these steps to ensure a safe and efficient removal process.
-
Gather Necessary Tools
Before starting the removal process, ensure you have the right tools at hand. Common tools needed include:
- Wrenches
- Screwdrivers
- Chain tool
- Socket set
- Allen keys
- Rubber mallet
- Pliers
-
Work in a Well-Lit Area
Select a clean, well-lit workspace for better visibility and to reduce the risk of losing small parts.
-
Inspect the Bike
Examine the bike to identify which components are salvageable. Check for rust, damage, or wear and decide what to remove.
-
Start with Less Complex Parts
Begin your removal with simpler parts to build confidence. Consider the following components:
- Pedals
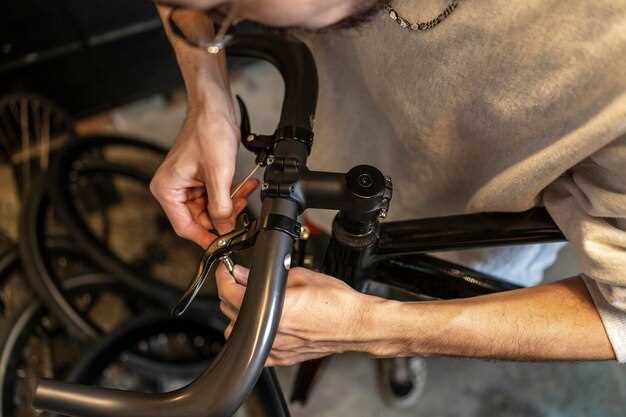
- Handlebars
- Seat and seat post
-
Follow a Logical Order
Remove parts in a logical sequence. This typically involves:
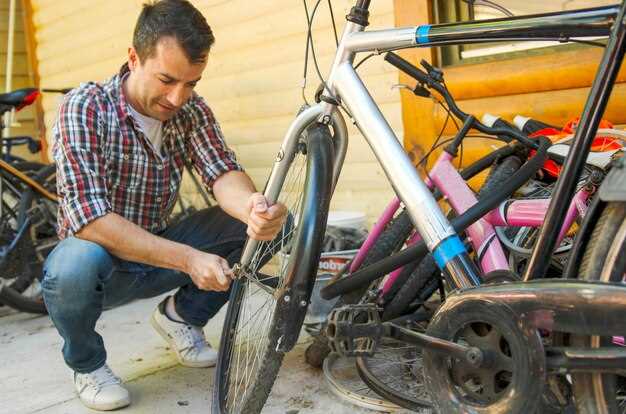
- Detaching the wheels
- Removing the drivetrain components
- Taking off the brakes
-
Use Proper Techniques
When detaching each part, use the appropriate technique to avoid damage:
- Apply adequate force using wrenches, but avoid overtightening.
- Utilize penetrating oil on rusted bolts to ease removal.
- Use a rubber mallet gently if parts are stuck.
-
Organize Removed Parts
As you detach parts, place them in designated containers or bags. Label them if necessary to ease reassembly or future reference.
-
Inspect Each Component
After removal, examine each part for usability. Clean and store them properly to maintain their condition.
-
Clean Your Workspace
Once the removal process is complete, tidy up your workspace to ensure safety and efficiency for future projects.
By following this guide and applying these tips, you can safely and effectively detach bike components from salvage bikes, ensuring you preserve as many usable parts as possible.